In what order should you remodel a house? In most cases, the project should begin with planning, inspections, design, and permits. Structural repairs and exterior protection come next, followed by demolition, framing, plumbing, electrical work, HVAC, insulation, drywall, flooring, cabinets, fixtures, and final inspections.
The exact order can change according to the home’s condition and the scope of the renovation. A cosmetic update involving paint and flooring will follow a much simpler process than a whole-house remodel that includes structural alterations and new mechanical systems.
Following a logical remodeling sequence helps protect completed work, coordinate different trades, reduce delays, and prevent expensive rework. This guide explains the typical order for remodeling a house and why each stage should happen when it does.
Before arranging the construction sequence, develop a clear scope, budget, and schedule. Our guide on how to plan a home remodel explains how to prepare these essential parts of the project.
The Typical Order for Remodeling a House
Although every renovation is different, the following table provides a practical overview of the usual remodeling sequence.
| Remodeling stage | Work commonly completed | Why it happens at this stage |
|---|---|---|
| Planning and inspection | Goals, scope, budget, property assessment | Identifies what must be done before construction |
| Design and permits | Drawings, engineering, product planning, approvals | Establishes the approved project requirements |
| Site preparation | Room clearing, dust barriers, utility planning | Protects occupants and unaffected areas |
| Demolition | Removal of old finishes, fixtures, walls, and systems | Exposes the structure and creates access |
| Structural and exterior work | Foundation, framing, roofing, windows, and exterior walls | Makes the building stable and weather-resistant |
| Rough mechanical work | Plumbing, electrical, HVAC, and ventilation | Installs systems that belong inside walls and ceilings |
| Insulation and air sealing | Wall, attic, and floor insulation | Improves performance before walls are closed |
| Drywall and wall preparation | Hanging, finishing, sanding, and priming | Creates finished interior surfaces |
| Cabinets and built-ins | Kitchen cabinets, vanities, and permanent storage | Establishes fixed dimensions for later finishes |
| Flooring and trim | Finished floors, doors, baseboards, and molding | Completes major visible surfaces |
| Fixtures and finishes | Lighting, plumbing fixtures, hardware, and appliances | Adds elements that could be damaged during heavy work |
| Final inspection and walkthrough | Testing, corrections, documentation, and cleanup | Confirms that the project is ready for use |
Some stages may overlap. However, work inside walls generally needs to be completed before the walls are closed, and dusty or destructive tasks should happen before delicate finishes are installed.
Start With Goals, Scope, and Budget
The first stage does not involve tools or demolition. It involves deciding what the project must accomplish.
Walk through the property and identify functional problems, necessary repairs, desired improvements, and long-term household needs. Separate required work from optional features.
The project scope should explain which rooms and building systems will be affected. It should also identify whether the renovation is cosmetic, structural, or a combination of both.
A clear scope helps homeowners obtain estimates based on comparable work. It also helps architects, designers, engineers, and contractors understand how changes in one room may affect another part of the house.
Establish the budget during this stage. Include professional fees, permits, construction, materials, temporary housing, cleanup, and a contingency reserve.
Unexpected expenses can occur after demolition reveals concealed damage. Our guide to hidden home remodeling costs explains which additional expenses homeowners should consider before approving a budget.
Inspect the Existing House
Before developing the final design, evaluate the home’s existing condition. A renovation plan based only on visible finishes may overlook structural, electrical, plumbing, moisture, roofing, or ventilation problems.
The appropriate inspection depends on the property and proposed work. Possible areas of concern include:
- Foundation movement
- Roof leaks
- Water-damaged framing
- Pest damage
- Mold or moisture
- Outdated electrical wiring
- Corroded plumbing
- Inadequate insulation
- Unsafe previous renovations
- Heating and cooling limitations
A whole-house remodel may provide an opportunity to correct these problems, but repairs can affect the project’s scope, cost, and sequence.
Older homes may also contain hazardous materials. Homes built before 1978 are more likely to contain lead-based paint. The Environmental Protection Agency provides lead-safe renovation information for homeowners planning work that may disturb painted surfaces.
Suspected lead, asbestos, mold, or other hazardous materials should be evaluated before ordinary demolition begins.
Complete the Design Before Demolition
Finalize the layout and major construction details before removing walls or fixtures. Beginning demolition with an incomplete design can leave the project waiting for decisions, drawings, engineering, or unavailable materials.
The design stage may include:
- Floor plans
- Structural drawings
- Electrical and lighting plans
- Plumbing locations
- HVAC and ventilation changes
- Cabinet layouts
- Window and door specifications
- Material selections
- Accessibility features
- Energy-efficiency improvements
The design should account for how different systems interact. Moving a kitchen sink, for example, could affect plumbing, cabinets, countertops, flooring, lighting, and electrical outlets.
Select long-lead products early. Custom cabinets, windows, doors, appliances, and specialty fixtures may need to be ordered well before installation.
Obtain Required Permits and Approvals
Determine which permits are required before construction begins. Structural work, additions, plumbing, electrical work, HVAC changes, and other significant improvements commonly require approval.
Permit requirements vary by jurisdiction. Homeowners can use the USAGov local government directory to locate their city or county government and find the appropriate building department.
Ask the local authority:
- Which permits apply to the project?
- What drawings or engineering documents are required?
- Who may apply for the permits?
- Which inspections will be necessary?
- How long does the review process normally take?
- Are there zoning or historic-property restrictions?
Homeowners should also check whether a homeowners association or similar organization requires separate approval. Association approval does not replace government permits.
Do not schedule major demolition until necessary approvals are in place.
Prepare the Home and Work Area
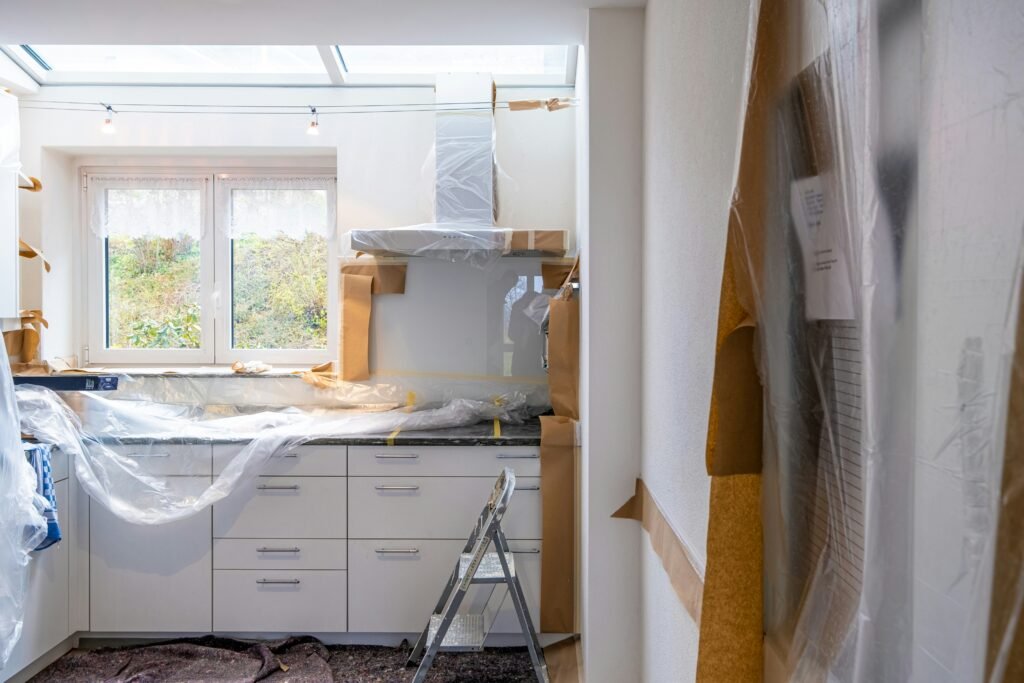
Before demolition, remove personal belongings, furniture, artwork, electronics, and other items from the work zone.
Site preparation may include:
- Installing dust barriers
- Covering floors and stairs
- Protecting doors and walls
- Identifying worker access routes
- Establishing material-storage areas
- Arranging waste containers
- Planning temporary utility interruptions
- Protecting children and pets
- Setting up temporary living spaces
A major kitchen remodel may require a temporary cooking area. A bathroom renovation may require another functional bathroom to remain available. For an extensive whole-house remodel, temporary housing may be necessary.
Photograph the existing condition of rooms and exterior areas near the construction zone. These images can help document any accidental damage that occurs during the work.
Complete Demolition Carefully
Once the design, permits, and site preparation are complete, demolition can begin.
Demolition may involve removing cabinets, flooring, drywall, fixtures, nonstructural partitions, or outdated systems. It should follow the approved scope rather than becoming an uncontrolled process of removing everything that appears old.
Certain utilities may need to be disconnected or made safe before demolition. Structural walls should never be removed without confirming how loads will be supported.
Demolition may reveal conditions that were not visible during planning, including water damage, unsafe wiring, plumbing leaks, or inadequate framing. Pause the affected work when necessary and evaluate the problem before proceeding.
Request written documentation for any change in scope. A change order should explain the new work, added cost, and effect on the schedule.
Address Structural Problems First
After demolition exposes the building, complete structural repairs and alterations before mechanical systems or decorative finishes.
Structural work may include:
- Foundation repairs
- Floor-system repairs
- Beam and column installation
- Load-bearing wall modifications
- Framing new walls
- Repairing roof structures
- Widening doorways
- Building additions
- Correcting damaged subfloors
This stage establishes the shape, stability, and dimensions of the remodeled space. Plumbing lines, electrical boxes, cabinets, and finish materials should not be installed until the framing is accurate and approved where inspections are required.
If the project involves substantial structural changes, qualified professionals should determine the appropriate design and construction methods.
Make the House Weather-Resistant
Exterior openings and weather-related problems should generally be addressed before sensitive interior work.
This stage may include roofing, exterior sheathing, flashing, windows, exterior doors, siding, and repairs to water-damaged exterior walls.
The objective is to create a weather-resistant building before insulation, drywall, cabinets, flooring, and other interior finishes are installed.
Installing interior materials while the roof or exterior walls are still leaking can lead to moisture damage, mold, staining, or wasted work.
The precise sequence of windows, siding, roofing, and interior framing depends on the project design. The professionals managing the project should coordinate these components to maintain proper drainage and weather protection.
Complete Rough Plumbing
Rough plumbing refers to supply, drain, waste, and vent components installed before walls and floors are closed.
During this stage, plumbers may:
- Reroute water-supply lines
- Install drain and vent piping
- Prepare connections for sinks and appliances
- Set shower or bathtub components
- Relocate laundry connections
- Install piping for new bathrooms
- Address corroded or unsuitable pipes
Final faucets, sinks, toilets, and decorative fixtures are usually installed much later so they are not damaged during construction.
Plumbing relocation can affect framing and cabinet dimensions, so it must be coordinated with the approved plans.
Install Rough Electrical Work
After the framing and layout are established, electricians can install wiring, boxes, circuits, and other components that belong inside walls and ceilings.
Rough electrical work may include:
- New circuits
- Wiring for lights and outlets
- Switch locations
- Appliance connections
- Smoke and carbon monoxide alarm wiring
- Data and communication cables
- Electrical panel changes
- Wiring for heating and cooling equipment
The placement of cabinets, mirrors, appliances, fixtures, and furniture should be considered before boxes are installed.
Changing outlet or lighting locations after drywall is complete can require opening and repairing finished surfaces.
Complete HVAC and Ventilation Work
Heating, cooling, and ventilation work usually occurs alongside rough plumbing and electrical work.
This stage may include:
- Installing or relocating ductwork
- Adding supply and return-air openings
- Installing bathroom exhaust ducts
- Modifying kitchen ventilation
- Running refrigerant or control lines
- Preparing new equipment connections
- Improving airflow to remodeled rooms
Changes to the home’s layout or conditioned area may affect system performance. An addition, finished basement, or removed wall can change heating and cooling needs.
Ventilation should be treated as part of the building system rather than a decorative decision made near the end of construction.
Schedule Rough-In Inspections
Plumbing, electrical, mechanical, and framing inspections may be required before insulation or drywall covers the work.
The inspector may need to see wiring, piping, ductwork, connectors, fastening, fire-blocking, or structural components while they remain accessible.
Do not close walls prematurely. If concealed work has not been inspected when required, finished materials may need to be removed.
Correct identified issues, document approvals, and retain inspection records with the project files.
Install Insulation and Complete Air Sealing
Insulation and air sealing usually occur after rough mechanical work has been installed and inspected but before drywall closes the walls.
This stage provides an opportunity to improve comfort and reduce unwanted air movement through the building enclosure.
Common areas include:
- Exterior walls
- Attics
- Roof assemblies
- Floors above unconditioned spaces
- Rim joists
- Areas around windows and doors
- Openings for pipes, ducts, and wiring
Insulation must be compatible with the home’s climate, construction, moisture conditions, and ventilation strategy.
ENERGY STAR provides neutral guidance about air sealing and home insulation. Major changes should be coordinated with qualified professionals because air sealing can affect moisture management, indoor air quality, and mechanical-system operation.
Hang and Finish Drywall
Once inspections and insulation are complete, drywall or another approved wall material can be installed.
The process normally includes hanging the panels, applying joint compound, taping, drying, sanding, and preparing the surfaces for paint.
Drywall work produces substantial dust. It should generally happen before finished flooring, decorative fixtures, and other easily damaged materials are installed.
After sanding is complete, clean the space carefully. Primer can then be applied to seal the new surfaces and reveal areas that require additional finishing.
Complete Initial Painting
Some projects receive a preliminary coat of paint before cabinets, flooring, and trim are installed. This approach can make large wall and ceiling areas easier to access.
Final touch-ups may still be necessary after cabinets, doors, trim, lighting, and flooring are complete.
The best painting sequence depends on the flooring material, trim method, cabinet installation, and preferences of the professionals performing the work. The important point is to coordinate painting so finished surfaces are protected from overspray, dust, and damage.
Install Cabinets and Built-In Features
Kitchen cabinets, bathroom vanities, shelving, and other built-ins are normally installed after drywall is finished and the space has been prepared.
Cabinets must be placed accurately because countertops, appliances, plumbing fixtures, backsplashes, and finish trim depend on their dimensions.
Confirm that:
- Walls are ready for installation
- Floors and walls are sufficiently level
- Plumbing and electrical connections are correctly located
- Cabinet dimensions match the approved layout
- Appliances will fit the designated openings
- Required clearances are maintained
Countertops are often measured after base cabinets have been installed. Fabrication may require additional time, which should be included in the schedule.
Decide When to Install Finished Flooring
There is no single flooring sequence that applies to every material or project.
Some flooring may be installed before cabinets, while other products are installed around permanent cabinets. Floating floors, for example, may have manufacturer requirements that affect whether cabinets can sit on top of them.
The sequence can also depend on:
- Flooring material
- Cabinet design
- Appliance placement
- Moisture conditions
- Required acclimation
- Manufacturer instructions
- Risk of construction damage
If flooring is installed before the remaining work is complete, it should be protected carefully.
Follow the installation requirements for the specific product rather than relying on a universal rule.
Install Doors, Trim, and Finish Carpentry
Interior doors, baseboards, casing, crown molding, stair components, and other finish carpentry are installed after the major dusty and destructive work is complete.
Trim may be installed before or after finished flooring, depending on the material and construction method.
Finish carpentry requires precise measurements and is more vulnerable to dents, scratches, moisture, and construction traffic. Installing it later helps preserve the finished appearance.
Nail holes, joints, and minor surface imperfections can then be filled, sanded, caulked, and painted.
Add Fixtures, Appliances, and Hardware
The project now reaches the finish-installation stage. Workers can install the visible components connected to systems prepared earlier.
These may include:
- Faucets and sinks
- Toilets and shower trim
- Light fixtures
- Switch and outlet covers
- Appliances
- Cabinet hardware
- Mirrors
- Towel bars
- Door handles
- Thermostats
- Vent covers
Each item should be tested after installation. Check water connections, drains, electrical operation, appliance clearances, ventilation, door movement, and hardware alignment.
Installing these items near the end reduces the likelihood that they will be damaged during heavy construction.
Finish Painting and Touch-Ups
After fixtures, trim, cabinets, and other components are installed, complete the final paint coats and touch-ups.
Inspect walls, ceilings, doors, and trim under both natural and artificial light. Look for marks, uneven coverage, unfilled nail holes, damaged corners, or areas affected by installation work.
Retain a record of paint manufacturers, product lines, colors, and finishes. Leftover labeled paint can be useful for future repairs.
Complete Final Inspections
Projects requiring permits may need final inspections before the work is considered complete.
Inspectors may verify that the approved plans were followed and that required corrections have been completed. Keep copies of final approvals and other permit documents.
Do not assume that completion of construction automatically means all permits have been closed. Confirm the status with the contractor or local authority.
Conduct a Detailed Final Walkthrough
Walk through the remodeled space with the contractor and create a written punch list.
Examine:
- Doors and drawers
- Flooring and tile
- Countertops
- Paint and trim
- Faucets and drains
- Lighting and outlets
- Appliances
- Windows and locks
- Ventilation
- Cabinet alignment
- Caulking and grout
- Exterior repairs
Test operable features rather than judging the project only by appearance.
Agree on how and when incomplete or defective items will be corrected. Retain warranties, manuals, inspection records, product information, and final invoices with the property documents.
Clean the House and Prepare It for Use
Construction cleanup may not include detailed cleaning. Fine dust can settle inside cabinets, on windows, around vents, and in nearby rooms.
Final cleaning may involve:
- Removing protective coverings
- Cleaning floors and windows
- Wiping cabinets and shelving
- Cleaning fixtures and appliances
- Replacing HVAC filters
- Removing labels and packaging
- Clearing exterior debris
- Restoring storage areas
Ask what level of cleaning is included in the contract. If detailed post-construction cleaning is excluded, include it in the project budget.
Should You Remodel the Whole House at Once?
Completing a whole-house renovation at once may provide better coordination among structural, electrical, plumbing, and finish work. It can also reduce repeated setup, demolition, and cleanup.
However, renovating in stages may be more manageable financially and allow homeowners to continue occupying part of the property.
The right approach depends on:
- Available budget
- Financing
- Project complexity
- Household needs
- Ability to relocate temporarily
- Condition of building systems
- Availability of professionals and materials
If remodeling in phases, complete urgent structural, moisture, roofing, electrical, and plumbing work before cosmetic improvements. Avoid installing finishes that will need to be removed during a later phase.
Frequently Asked Questions
What room should you remodel first?
The first room depends on the home’s condition and the homeowner’s priorities. Address active leaks, structural concerns, unsafe wiring, plumbing failures, and other urgent problems before cosmetic rooms. If the property is sound, prioritize the room that creates the greatest functional improvement.
Should flooring be installed before or after cabinets?
It depends on the flooring product, cabinet design, appliance requirements, and installation instructions. Some flooring can extend beneath cabinets, while floating products may need to be installed around permanent cabinetry.
Does plumbing or electrical work come first?
Plumbing, electrical, and HVAC rough-ins are usually coordinated rather than treated as completely separate stages. The exact order depends on the framing, pipe routes, ducts, wiring, and inspection requirements.
Should you paint before installing flooring?
Painting walls and ceilings before finished flooring may reduce the risk of paint damage to the floor. However, final touch-ups are often needed after trim, cabinets, and fixtures are installed.
When should windows be replaced during a remodel?
Windows are generally addressed during the exterior and weather-protection stage, before sensitive interior finishes. The specific sequence depends on the wall system, siding, flashing, and interior trim.
When should insulation be installed?
Insulation is normally installed after rough plumbing, electrical, HVAC, and required inspections but before drywall closes the walls and ceilings.
What is the last stage of remodeling a house?
The final stage normally includes inspections, a detailed walkthrough, punch-list corrections, documentation, and cleaning. The project should not be considered complete until systems are tested and required approvals are closed.
Follow the Sequence, but Remain Flexible
The typical remodeling order provides a useful framework, but it is not an inflexible schedule for every house. Structural conditions, permit requirements, product instructions, inspections, and trade availability may require adjustments.
What matters most is completing concealed structural and mechanical work before closing walls, protecting the home from weather before installing sensitive materials, and postponing delicate finishes until destructive work is complete.
A coordinated sequence helps avoid opening newly finished walls, damaging completed floors, or delaying one trade because another stage was missed.
Remodeling Note: Every home and remodeling project has different structural, financial, permitting, sequencing, and safety considerations. Building codes, inspection requirements, and appropriate construction methods also vary by location. Before beginning a major renovation, speak with a qualified remodeling professional who can evaluate your property, coordinate the appropriate order of work, and help you develop a plan suited to your home, goals, and budget.