Houston backwater valves deserve attention when a renovation changes the plumbing that carries wastewater away from a home. Moving a bathroom, adding laundry connections, or replacing underground drains can create an opportunity to evaluate sewer-backup protection before construction makes those pipes difficult to reach.
However, installing a valve is only one part of the decision. Its usefulness depends on the drainage layout, the fixtures connected to it, its location, and the ability to inspect it after the renovation.
Homeowners should understand those relationships before approving plumbing work or committing to permanent finishes.
Understand What a Backwater Valve Protects
A sewer backwater valve is designed to resist wastewater flowing backward through a drainage pipe. During normal operation, wastewater can leave through the protected line. When reverse flow occurs, the valve’s mechanism closes or is closed, depending on the device.
FEMA identifies backwater valves as a protective measure when overloaded municipal sewers cause wastewater to back toward buildings. They address a particular route through which sewage can enter a property.
A valve does not prevent rainwater from entering through doors, walls, or other openings.
It is also different from a drinking-water backflow prevention assembly. Those devices protect water-supply systems rather than household drainage. A visible irrigation backflow device does not establish that the home has sewer-backup protection.
Establish Whether the Renovation Calls for an Assessment
A new vanity or tile finish does not, by itself, establish that a backwater valve is required. The plumbing scope and the property’s relationship to the sewer need evaluation.
For a sewer-connected home, ask the plumber to assess the elevations of the relevant fixtures and floors against the next upstream public-sewer manhole. A home without a basement can still have vulnerable fixtures; the important relationship is elevation, rather than the room’s name.
Describe any previous backups, including which fixtures overflowed, whether heavy rain was occurring, and what repairs followed. These details help the plumber investigate the cause.
If the property uses a septic system, explain that at the outset. Advice based on a municipal sewer connection should not be applied without reviewing the actual wastewater system.
Map Which Fixtures Would Be Protected
Ask for a simple drainage sketch showing the proposed valve and the connections serving each affected room.
A general description such as “install sewer protection” leaves an important question unanswered: which drains will actually pass through the device?
For example, suppose a renovation adds a laundry drain that joins the sewer pipe on the public-sewer side of an existing valve. That connection would not gain protection from a valve located farther back toward the house.
The review should account for existing connections as well as new ones. An overlooked floor drain or a separately routed bathroom may change the proposed arrangement.
Have the plumber identify any fixtures that must use a different route under the applicable code. Do not assume that sending every drain through one valve is automatically appropriate.
Choose the Location Before Finalizing Finishes
A valve location needs to work for both the plumbing system and the completed renovation.
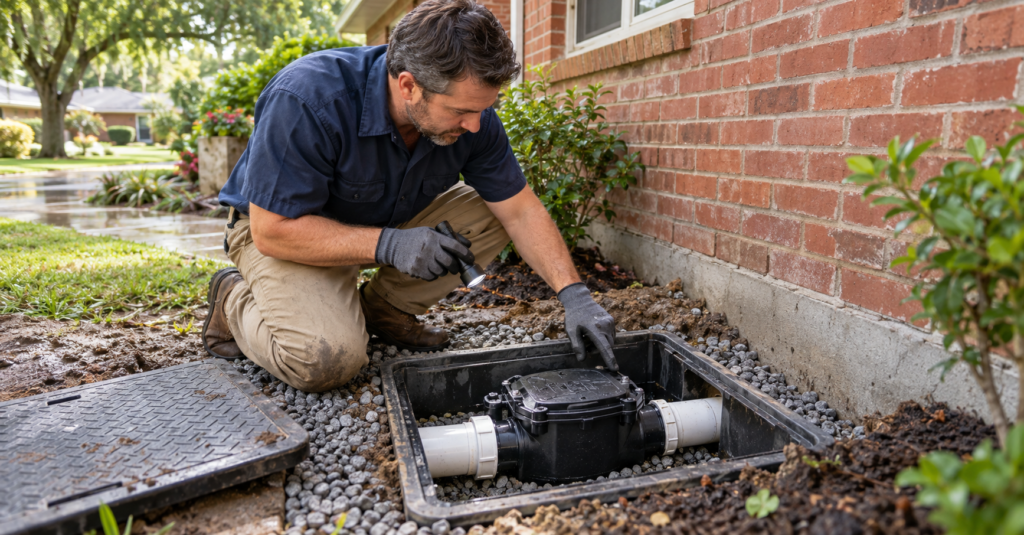
Ask where the access opening will sit relative to proposed cabinets, flooring, appliances, patios, and landscaping. An enclosure that is accessible during construction may become difficult to reach once those features are installed.
For an interior location, discuss how someone will remove the cover and service the working parts. A hatch beneath a permanently installed cabinet can create an expensive maintenance problem.
For an exterior location, review the proposed finished grade and nearby improvements. Future paving, a planter, or a deck should not bury the access point.
Request the access dimensions and removal requirements for the selected device before approving the surrounding design. Accessibility should be shown on the drawings rather than left for the installer to resolve at the end.
Investigate Existing Drain Problems Separately
A backwater valve should not substitute for diagnosing recurring drainage trouble.
Slow drains, repeated clogs, and sewage returning through a fixture can have different causes. Ask whether the investigation indicates a public-sewer surcharge, a blockage in the private line, damaged piping, or another problem.
Where appropriate, a camera inspection and pipe locating may help establish the condition and route of the existing drain. Ask what the inspection can confirm and what remains uncertain.
Separate necessary pipe repairs from the proposed valve installation in the written scope. Otherwise, homeowners may approve a protective device while assuming that an existing obstruction or damaged section is also being corrected.
Confirm Houston Permit and Contractor Responsibilities
Verify which authority regulates the property. A Houston mailing address alone should not be used to decide which permitting rules apply.
Within the city, Houston’s construction requirements combine adopted model codes with local amendments. The plumber should evaluate the proposed work against the applicable provisions rather than relying on an installation diagram from another jurisdiction.
The Texas State Board of Plumbing Examiners recommends checking the Responsible Master Plumber’s license and insurance information and confirming local permit and inspection requirements. Its consumer guidance also recommends detailed written estimates.
Before work begins, identify who will obtain permits, arrange inspections, and address any required corrections. Include excavation, access boxes, testing, and surface restoration in the scope so responsibility for completing the installation is clear.
Coordinate the Work Before Pipes Are Covered
Valve installation can involve more than the plumbing contractor. Flooring installers, concrete crews, landscapers, and cabinet installers may all affect access or the order of work.
Ask the project team to establish when the installation must remain exposed for required inspection and testing. Schedule backfilling, concrete repairs, and finish installation around that point.
If reaching the drain involves opening a slab, the contractor should assess the proposed opening before cutting. The location of the pipe does not establish that any route through the foundation is suitable.
Our guide to coordinating remodeling trades explains how to assign responsibilities when several contractors depend on the same unfinished area.
Photograph the completed pipe connections before they are concealed.
Understand Water Use When the Valve Closes
A closed valve can stop wastewater from entering through the protected pipe, but it can also prevent wastewater from leaving through that route.
FEMA warns that using connected toilets, sinks, showers, washing machines, or dishwashers while a backwater valve is closed can cause wastewater to accumulate inside the home’s drainage system.
Ask the installer how the household will know when to stop using the affected fixtures and when normal use can resume.
Also clarify whether the selected device operates automatically, requires manual action, or includes an alert. An alarm is useful only when occupants understand what it means and how to respond.
Arrange Maintenance for the Specific Device
A valve should remain part of the home’s maintenance routine after the renovation ends.
Debris can interfere with a check valve’s closing mechanism. FEMA’s retrofitting guidance identifies regular inspection and cleaning as necessary to address that risk.
Obtain the manufacturer’s instructions and a maintenance schedule appropriate to the installed model and property conditions. Ask which tasks the homeowner can safely perform and which require a plumber.
The handover should include:
- The valve model and its exact location.
- A drawing identifying the protected drain connections.
- Operating and maintenance instructions.
- Permit and inspection records where applicable.
- Photographs taken before the piping was concealed.
Keep these records with the renovation documents so future plumbing changes can account for the existing installation.
Note: This article provides general renovation guidance. Backwater-valve requirements and suitability depend on the property, drainage layout, applicable codes, and selected device. Confirm the design and installation requirements with a qualified licensed plumber and the authority responsible for the property.