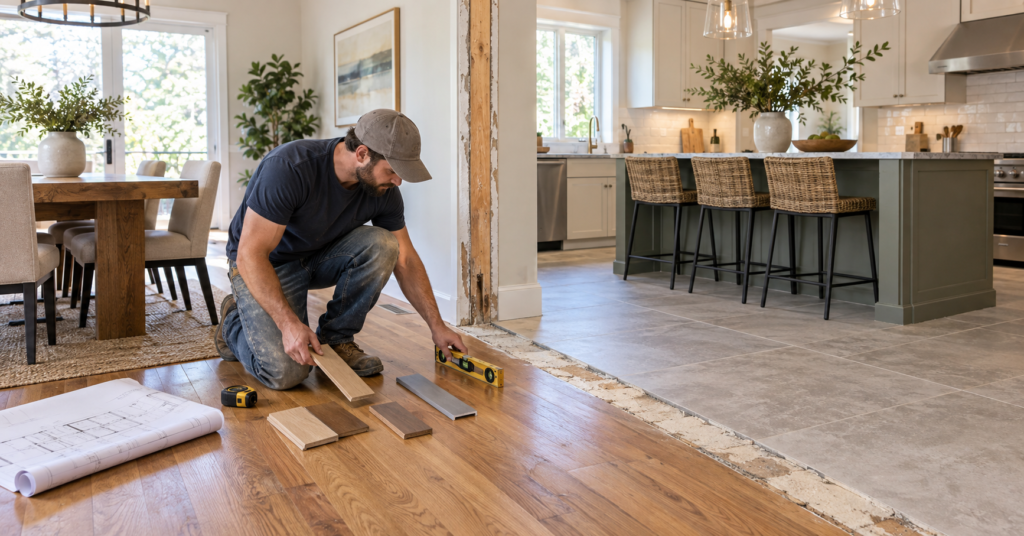
Removing an interior wall can connect two rooms while exposing an unexpected problem at floor level. The former wall may leave a bare strip between different materials, reveal uneven subfloors or expose flooring that stops at completely different lines.
This gap is often treated as a minor repair to solve after demolition. By then, the homeowner may have limited options because the island, cabinets or new flooring have already been ordered.
Successful floor transition designs account for material, height, plank direction, movement and the new room layout before the wall comes down. The goal is to make the finished floor look intentional while remaining safe and practical underfoot.
Document Both Floors Before Demolition
Start by identifying exactly what exists on each side of the wall. Two floors that appear level may have different layers beneath their visible surfaces.
Record:
- Finished flooring material
- Direction and dimensions of boards or tiles
- Height of each finished surface
- Subfloor type
- Underlayment
- Adhesive or mortar layers
- Condition near the wall
- Heating systems beneath the floor
- Previous patches
- Available matching material
Measure at several locations. Older floors can rise, fall or slope across the same opening, and a transition designed from one measurement may not fit along the entire wall line.
Photograph the floor before protective coverings are installed. These images can help reconstruct patterns and identify which boards or tiles were removed during demolition.
Determine What Lies Beneath the Wall
The strip beneath an interior wall may contain continuous subfloor, separate subfloors or no suitable support for new finish material.
After the wall is removed safely, inspect the exposed area for:
- Framing gaps
- Damaged subfloor
- Fasteners
- Adhesive
- Floor-level changes
- Wiring or pipes
- Tile backer board
- Mortar beds
- Hardwood edges
- Signs of moisture
- Previous wall locations
Do not install a decorative strip over an unstable opening. The substrate must provide appropriate support for the selected transition.
TCR’s guide to exploratory demolition before a remodel explains why limited investigation can be useful when important construction details remain concealed.
Decide Whether the Rooms Should Read as One Space
The correct transition depends partly on the intended visual relationship between the former rooms.
If the kitchen and dining room should feel completely unified, continuous flooring may provide the strongest result. If each area still serves a distinct function, a visible material change can define the zones without rebuilding a wall.
Consider the view from:
- Main entrances
- Adjacent hallways
- Seating areas
- Kitchen work zones
- Stairways
- Exterior doors
- Frequently used walking paths
A transition that seems unobtrusive from above may become a dominant line when viewed from across the room.
TCR’s article on open-plan remodel sightlines explains how design decisions should be reviewed from the positions people actually use.
Continue One Flooring Material Through Both Rooms
Replacing or extending one material across the combined space can create the cleanest appearance. It eliminates an arbitrary division where the wall previously stood.
This approach may be appropriate when:
- One existing floor already needs replacement
- Matching material is available
- The subfloor can be prepared consistently
- The new room benefits from visual continuity
- The material suits both functional areas
Continuity can make a space appear larger, but it may require removing flooring that remains in good condition. The decision should compare the cost and disruption of full replacement with the limitations of a localized patch.
A continuous floor also requires careful layout. Installing the same product in both rooms does not guarantee that board joints, tile lines or plank direction will meet correctly.
Patch the Wall Footprint With Matching Material
A localized patch may preserve both existing floors when they are the same material and closely aligned. Hardwood is sometimes repairable by weaving new boards into the existing field rather than installing one straight strip.
The feasibility depends on:
- Species
- Board width and thickness
- Edge profile
- Direction
- Existing finish
- Age and colour
- Subfloor access
- Length of the exposed gap
New wood may not immediately match older flooring. Sanding and refinishing a larger area can create a more consistent appearance, but it increases the scope.
Tile patches are usually less forgiving. Even when spare tile exists, differences in dye lot, grout colour or surface wear may make the repaired strip noticeable.
Turn the Gap Into a Deliberate Border
When an invisible patch is unrealistic, a contrasting border can make the transition look purposeful.
Possible border materials include:
- Wood in a contrasting species
- Stone
- Tile
- Metal
- Terrazzo
- A custom threshold
- A coordinated material used elsewhere in the room
The border should relate to another feature rather than appearing as an isolated strip. It might match an island, fireplace surround, stair detail or cabinetry finish.
Width matters. A strip that is only as wide as the former wall may look like a covered repair. Expanding it to a carefully proportioned band can create a stronger design feature, provided it does not interrupt circulation.
Avoid Narrow Filler Pieces
Small pieces are often used when the exposed gap does not align with the dimensions of the existing floor. These fragments can look improvised and may be difficult to install securely.
Examples include:
- Thin tile slivers
- Short hardwood pieces
- Narrow strips beside an island
- Irregular wedges
- Multiple threshold pieces joined together
Adjusting the transition line slightly may allow full or more balanced pieces. This could mean cutting back part of the existing floor to establish a clean edge.
Removing additional intact material can feel wasteful, but it may produce a more stable and visually convincing result than filling the exact demolition footprint.
Address Different Floor Heights
Adjoining rooms may have different elevations because one contains tile over backer board, additional underlayment or several layers of older flooring.
The design options depend on the amount and direction of the change.
A small difference may be handled with a tapered transition. A larger change may require:
- Removing excess layers
- Raising the lower subfloor
- Rebuilding part of the floor assembly
- Creating a broad ramped section
- Introducing a defined step
- Replacing one floor
The transition should not create an abrupt edge in a major walking path. Evaluate how it will feel under bare feet, shoes, furniture wheels and mobility equipment.
Do not assume that a thick decorative threshold solves the underlying problem. It may cover the joint while making the change more noticeable and difficult to cross.
Consider Raising the Lower Room
Bringing the lower floor closer to the higher elevation can reduce the need for a pronounced threshold. However, raising an entire room affects more than flooring.
Check the resulting relationship with:
- Door clearances
- Exterior thresholds
- Baseboards
- Cabinets
- Appliances
- Stairs
- Floor vents
- Radiators
- Adjacent rooms
A height adjustment that works at the removed wall may create a new conflict at another doorway.
The build-up must also suit the selected flooring and existing structure. Added layers should not be used to conceal moisture, movement or a damaged subfloor.
Consider Lowering the Higher Room
Removing tile, mortar beds or multiple flooring layers may create a more uniform elevation. This approach can also reveal the condition of the underlying structure.
Demolition may expose:
- Adhesive residue
- Damaged wood
- Cracks
- Uneven patches
- Additional flooring
- Fastener damage
- Incompatible underlayment
The estimate should distinguish flooring removal from subfloor correction. “Remove existing tile” does not necessarily include grinding, patching, leveling or replacing damaged sheathing afterward.
Hazardous-material testing may be necessary before disturbing older flooring, adhesives or underlayment.
Position the Transition Under an Island
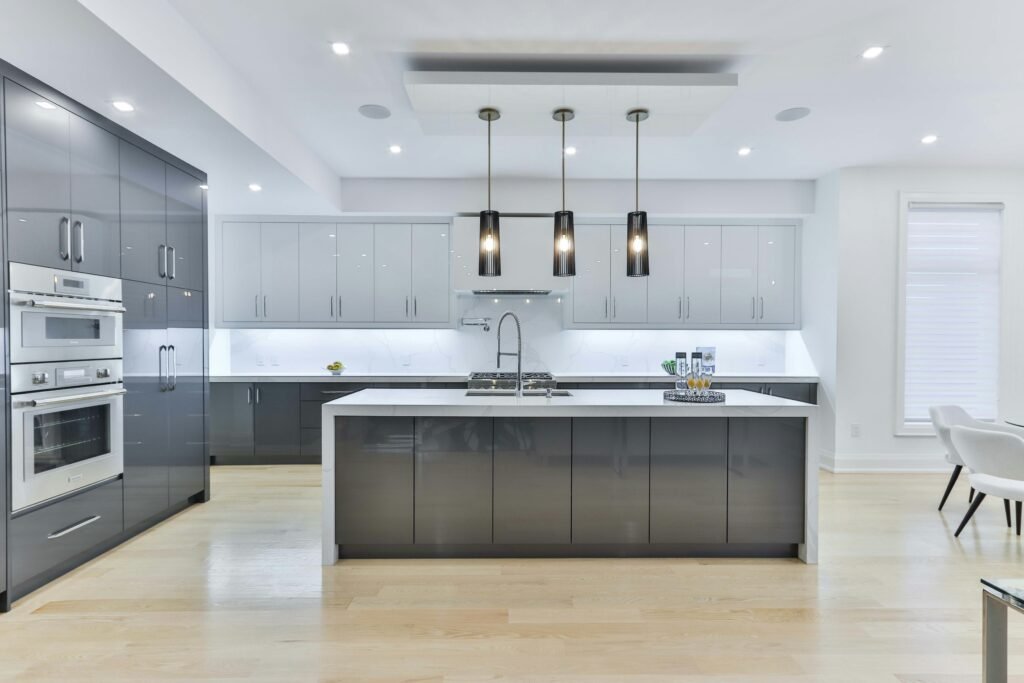
A kitchen island can conceal part of the former wall line, but it rarely covers the entire gap. Small exposed sections may remain at one or both ends.
Before using the island as the solution, draw its exact footprint over the demolition area. Include:
- Cabinet dimensions
- Finished end panels
- Countertop overhang
- Seating space
- Toe kicks
- Required aisle clearances
- Electrical or plumbing penetrations
The visible floor sections should receive intentional details rather than leftover filler pieces.
Avoid moving the island solely to hide the gap if the revised position reduces circulation or conflicts with appliances. Function should determine the island location; flooring should then be designed around the approved layout.
Decide Whether Flooring Runs Under the Island
Some flooring types may extend beneath fixed cabinetry, while others require installation methods that prevent them from being trapped. The correct approach depends on the product and assembly.
This decision affects:
- Expansion
- Future cabinet changes
- Island attachment
- Floor replacement
- Appliance clearances
- The appearance around toe kicks
Confirm the installation requirements before ordering materials or setting cabinets. Do not assume that every plank product can be installed continuously beneath a fixed island.
The plans should show where the flooring stops and how visible edges will be finished.
Review Flooring Direction
When separate rooms become one, their existing floors may run in different directions. The change may have been concealed by the wall and doorway but become obvious after opening the space.
Possible responses include:
- Keeping both directions and adding a border
- Replacing one side to match the other
- Creating a framed transition zone
- Using a herringbone or decorative inset
- Establishing a new direction throughout the combined area
Direction affects how long, wide and connected the room appears. It also relates to joist orientation, installation requirements and available board lengths.
Review the proposed pattern across the complete space rather than choosing a direction separately for each former room.
Align Tile Joints Intentionally
Tile grids rarely meet perfectly after a wall is removed. One room may have been laid out from a different starting point, resulting in offset grout lines.
Trying to extend one grid through a narrow gap can produce irregular cuts. A border may provide a cleaner separation between two patterns.
If one tiled area is being replaced, create a full layout showing:
- Grout-line positions
- Tile dimensions
- Island edges
- Cabinet lines
- Door openings
- Room centre lines
- Transition widths
- Perimeter cuts
A tile layout should balance the whole room, not merely begin with a full tile against the first visible wall.
Plan Hardwood Weaving Carefully
Weaving hardwood involves removing selected boards and inserting new pieces at staggered lengths so the repair does not form one continuous joint.
The process may create a convincing result when matching boards are available. Its success depends on the installer’s ability to reproduce the width, thickness, profile and appearance of the existing floor.
Before approving the method, determine:
- How many boards will be removed
- Whether the subfloor allows fastening
- How colour differences will be handled
- Whether the floor will be refinished
- Where the refinishing boundary will end
- How dust will be controlled
A small patch can lead to refinishing a much larger area when the existing finish cannot be blended locally.
Treat Floating Floors Differently
Floating flooring systems are designed to move as connected fields. Cutting, fastening or trapping them at a new transition can interfere with that movement.
Opening two rooms may create a larger continuous area than the product allows without a break. Doorway transitions that were previously acceptable may also need to be reconsidered.
Review:
- Maximum installation dimensions
- Expansion requirements
- Fixed cabinet locations
- Change in room geometry
- Heavy objects
- Required transition profiles
- Existing movement or buckling
Follow the requirements for the exact product. A solution that works for nailed hardwood may be unsuitable for laminate or floating resilient flooring.
Account for Expansion Gaps
Expansion space is usually concealed by baseboards, shoe molding or transition profiles. The former wall line may expose edges that were never intended to remain visible.
The new design should maintain necessary movement while producing a finished appearance. Do not fill an expansion gap rigidly simply because it appears untidy.
Possible solutions include:
- Proper transition profiles
- Recessed channels
- Removable covers
- Wider architectural borders
- Redesigned flooring fields
The transition detail should be selected before installation so the substrate and material edges can be prepared correctly.
Coordinate Baseboards and Wall Returns
Removing a wall also changes the baseboard layout. The flooring transition may terminate near a remaining wall return, post or cabinet panel.
Plan how baseboards will:
- End at the opening
- Meet different profiles
- Continue around posts
- Relate to a raised threshold
- Conceal perimeter gaps
- Align across different floor heights
If adjoining rooms have different baseboard heights, the change should occur at a clear architectural boundary. A small diagonal cut between profiles usually looks improvised.
Column wraps or short wall returns can provide deliberate termination points when they are proportioned as part of the overall opening.
Coordinate the Floor With a Structural Post
A wall removal may leave one or more posts supporting a beam. These posts affect the transition layout even when the floor is otherwise continuous.
Avoid positioning a narrow flooring strip around the post solely because it follows the previous wall footprint. Instead, decide whether the post belongs visually to one floor zone or sits within a broader border.
The post base, trim and flooring should be designed together. Installing the floor first may limit how the post can be finished without exposed gaps or bulky molding.
Consider a Wider Transition Zone
A broad transition can solve complicated geometry more effectively than a narrow threshold. It may form a small “bridge” between two materials using a third coordinated finish.
This approach can be useful when:
- Floors differ in both height and direction
- Matching material is unavailable
- The former wall was unusually thick
- A beam or ceiling transition defines the same boundary
- An island partly covers the area
- The opening contains structural posts
The width should relate to the architecture. Aligning it with a beam, cabinet end or opening depth can make the zone feel planned.
A third material should be used sparingly. If the adjoining floors are already visually busy, another pattern may create clutter rather than unity.
Avoid Placing Transitions in Chair and Stool Zones
A raised threshold beneath dining chairs or island stools can make furniture unstable. Repeated movement may also scratch or loosen the transition.
Map furniture positions before finalizing the line. Include the space chairs occupy when pulled away from the table or counter.
A transition is often more comfortable when located:
- Outside the main seating footprint
- Beneath a fixed cabinet
- Along the edge of a defined zone
- At a natural narrowing in circulation
Do not evaluate only the furniture’s resting position. Daily movement determines whether the transition becomes an annoyance.
Test Accessibility and Cleaning
A transition should be assessed for everyday use, not only photographed from above.
Consider how it affects:
- Walking
- Children
- Older residents
- Wheelchairs
- Walkers
- Robot vacuums
- Upright vacuums
- Mops
- Rolling furniture
- Pet movement
Deep grooves can collect debris, while proud metal edges may become uncomfortable or noisy. Highly polished thresholds can also be slippery.
A full-size sample placed in the intended walking path can reveal problems that a small material sample will not show.
Coordinate With Ceiling Transitions
The floor and ceiling do not need to change at precisely the same line, but unrelated transitions can make the new room feel fragmented.
Compare the floor detail with:
- Dropped beams
- Ceiling-height changes
- Soffits
- Lighting zones
- Cabinet runs
- Former wall locations
If the floor changes at one line and a large beam sits several inches away, consider whether adjusting one element would create a clearer boundary.
TCR’s guide to ceiling transitions in remodeled spaces explains how overhead changes can be aligned with the room layout.
Create a Scaled Floor Layout
A contractor should not have to choose the transition pattern after demolition with no approved drawing.
A useful layout should show:
- Transition location
- Width
- Material
- Flooring direction
- Tile or plank joints
- Island footprint
- Cabinet edges
- Structural posts
- Doorways
- Furniture zones
- Height changes
Include enlarged details for complicated intersections. A thin line on a general floor plan may not communicate how materials meet.
The drawing should correspond with the material schedule so everyone uses the same product, finish and dimensions.
Approve Physical Samples
Colours and textures can appear different under actual room lighting. View proposed transition materials against both existing floors.
A sample review should compare:
- Colour
- Grain
- Texture
- Sheen
- Thickness
- Edge profile
- Direction
- Width
Place samples flat on the floor rather than holding them vertically. Review them during daylight and under planned artificial lighting.
TCR’s article on verifying remodeling materials explains how samples, product numbers and written approvals can prevent unplanned substitutions.
Order Extra Matching Material
If the transition requires existing flooring to be patched, confirm that enough usable material is available before demolition begins.
Matching products may be:
- Discontinued
- Produced in a different size
- Manufactured with a changed profile
- Different in colour or texture
- Unavailable in a small quantity
Inspect stored leftovers for moisture damage, fading and dimensional changes. A box in the garage may not be suitable simply because the label matches.
Order reasonable overage for cutting, breakage and future repair. Record where remaining material will be stored after completion.
Include Subfloor Preparation in the Bid
A flooring proposal should specify what happens below the visible finish.
Clarify whether the price includes:
- Wall-footprint repair
- Fastener removal
- Adhesive removal
- Grinding
- Patching
- Leveling
- Underlayment
- Moisture testing
- Damaged-subfloor replacement
- Disposal
Subfloor work can be difficult to price before demolition. If an allowance is used, define its quantity or basis instead of listing a vague lump sum.
Inspect the Transition Before Final Installation
Once demolition and subfloor preparation are complete, compare the actual conditions with the approved detail.
Confirm:
- Final floor elevations
- Straight and secure edges
- Transition width
- Support beneath the joint
- Product compatibility
- Required movement space
- Relationship to the island
- Relationship to posts and walls
This checkpoint provides an opportunity to adjust the detail before finish material is cut. A transition that worked on paper may need refinement after the true floor heights are exposed.
Document any change in writing, including its effect on price and schedule.
Frequently Asked Questions
What should fill the gap left after removing a wall?
The solution may be matching flooring, a woven repair, a contrasting border, a custom threshold or a wider transition zone. The appropriate choice depends on the existing materials, floor heights and new layout.
Can hardwood be patched where a wall was removed?
Often, yes. New boards may be woven into the existing floor if compatible material is available and the substrate permits proper installation. Colour matching or broader refinishing may still be required.
How can tile and hardwood at different heights be connected?
A tapered transition may handle a small difference. Larger changes may require rebuilding part of the floor assembly, raising the lower side or removing layers from the higher side.
Should the transition be hidden beneath a kitchen island?
An island can conceal part of the former wall line, but exposed sections still need a complete design. The island should not be moved into a poor functional position solely to cover the floor.
Can two floating floors meet without a transition strip?
That depends on the exact products, room dimensions and installation requirements. Expansion and maximum-field limitations may require a transition even when the surfaces are level.
Should flooring direction change between connected rooms?
It can, but the change should occur at an intentional boundary. A border or defined transition zone may help two directions meet cleanly.
When should the transition be designed?
Ideally, before wall demolition, cabinet ordering and flooring installation. Early planning provides more options for changing floor build-up, island position and material layout.
Remodeling Note: This article provides general design information. Structural wall removal, flooring installation, hazardous materials, accessibility, moisture conditions and product requirements vary by project. Consult qualified professionals before removing walls or modifying floor assemblies.